Backyard Update, Part 1: Lighting!
Our backyard has always kind of stumped me because:
A. It’s basically a blank slate, and
B. I’m not exactly gifted with “outdoorsy” things
You should see my Outdoors board on Pinterest. Some of the pins I have saved are outrageous. A soaking pool? Who do I think I am, Beyonce? And I’m sure it could look like that!…if I spent about $60,000. But as we’ve already done an exterior renovation on the house, whatever budget we left have is primarily reserved for the interior. If I wanted to make any changes, I was going to have to get creative.

BEFORE. Fun fact: I took this pic at the open house! The tree on the edge of the patio is the one we had to remove.
Now, this might come as a surprise, but I’m not the best at compromising on my vision. Anyone who’s ever had to do a group project with me in school just rolled their eyes so far back into their head they are borderline blind after reading that last statement. But it’s true! Typically, if I can’t do something the way I want to do it, I won’t do it at all. That, or I’ll wait until I come up with a different approach that’s more doable while tackling another project. A perfectionist to a fault, sometimes that means living with something I hate vs something much more pleasing to the eye. So this backyard situation confounded me. All that was back there was a single tree (we had originally had two but had to remove one because it wasn’t indigenous to the area, kept splitting off, and was frankly a hazard), a patio set I purchased several years ago from Walmart, and the string lights I installed last summer. That’s it. I just couldn’t see a way to make any real improvements without dumping a ton of money into it.
As we’re in the middle of a pandemic, I didn’t think it made very much sense to blow hundreds of dollars — and that’s a modest estimate — turning it into my dream oasis (because there’s a 100% chance my oasis contains air conditioning). But as we’re in the middle of a pandemic, I had nothing but time and was spending ALL of it at home. A home that seemed smaller by the minute.

Post-tree removal. Still struggling with the layout. Teddy looks so young!
Ultimately, with a few hundred dollars and a lot of elbow grease (idk if my joints will ever recover from what I did to them on this project), I was able to transform this space into one that is functional and much more inviting! Also, the majority of our expenses went towards items that can come with us when we move. This is how I rationalize purchases to my husband, even though I often tell him that I’m never moving out of this house, ha! It’s not perfect, but it’s a vast improvement, so! Rather than turn this post into the length of a Jane Austen novel, I’m going to break down the main elements by sections and tell you how we did it, the level of difficulty, and the approximate cost so you can decide if these are projects you’d like to try, too!
First up…
String lights
The project so nice, we did it twice 😬
As far as lighting, we only had floodlights and one small light by the back door. Not much in the ambience department. I researched how to hang string lights to death and honestly…it really wasn’t as difficult as I made it out to be #themeofmylife
First, you need to map out where you want your lights to go. Of course I wanted to attach mine to a spot that didn’t actually exist. But that’s okay! If there’s no contact point, you can just create one! There are various methods for how to do this, but none of them were quite my vibe. Ultimately, I decided to install a post in the center of the end of the patio pavers. I thought it would blend with the fence. Also, I have dreams of flanking the post with a post on each side and building a cool privacy wall…

Image via Pinterest
…maybe with a fun modern pattern painted on it like this…

We don’t really need privacy and our neighbors have a raised deck anyways. I’m just trying to jazz things up back there! So with that in mind, we followed this tutorial from Quikrete for how to set a post, and it was pretty simple!
We purchased an 8 foot pressure treated post, a bag of Quikrete Fast Setting Mix, and a post level. Justin dug a 24 inch hole (which was the only labor intensive portion of this effort), we poured the Quikrete inside, added water, waited 45 minutes, and then marveled at our shiny new post.
Then came the math.
Oof.
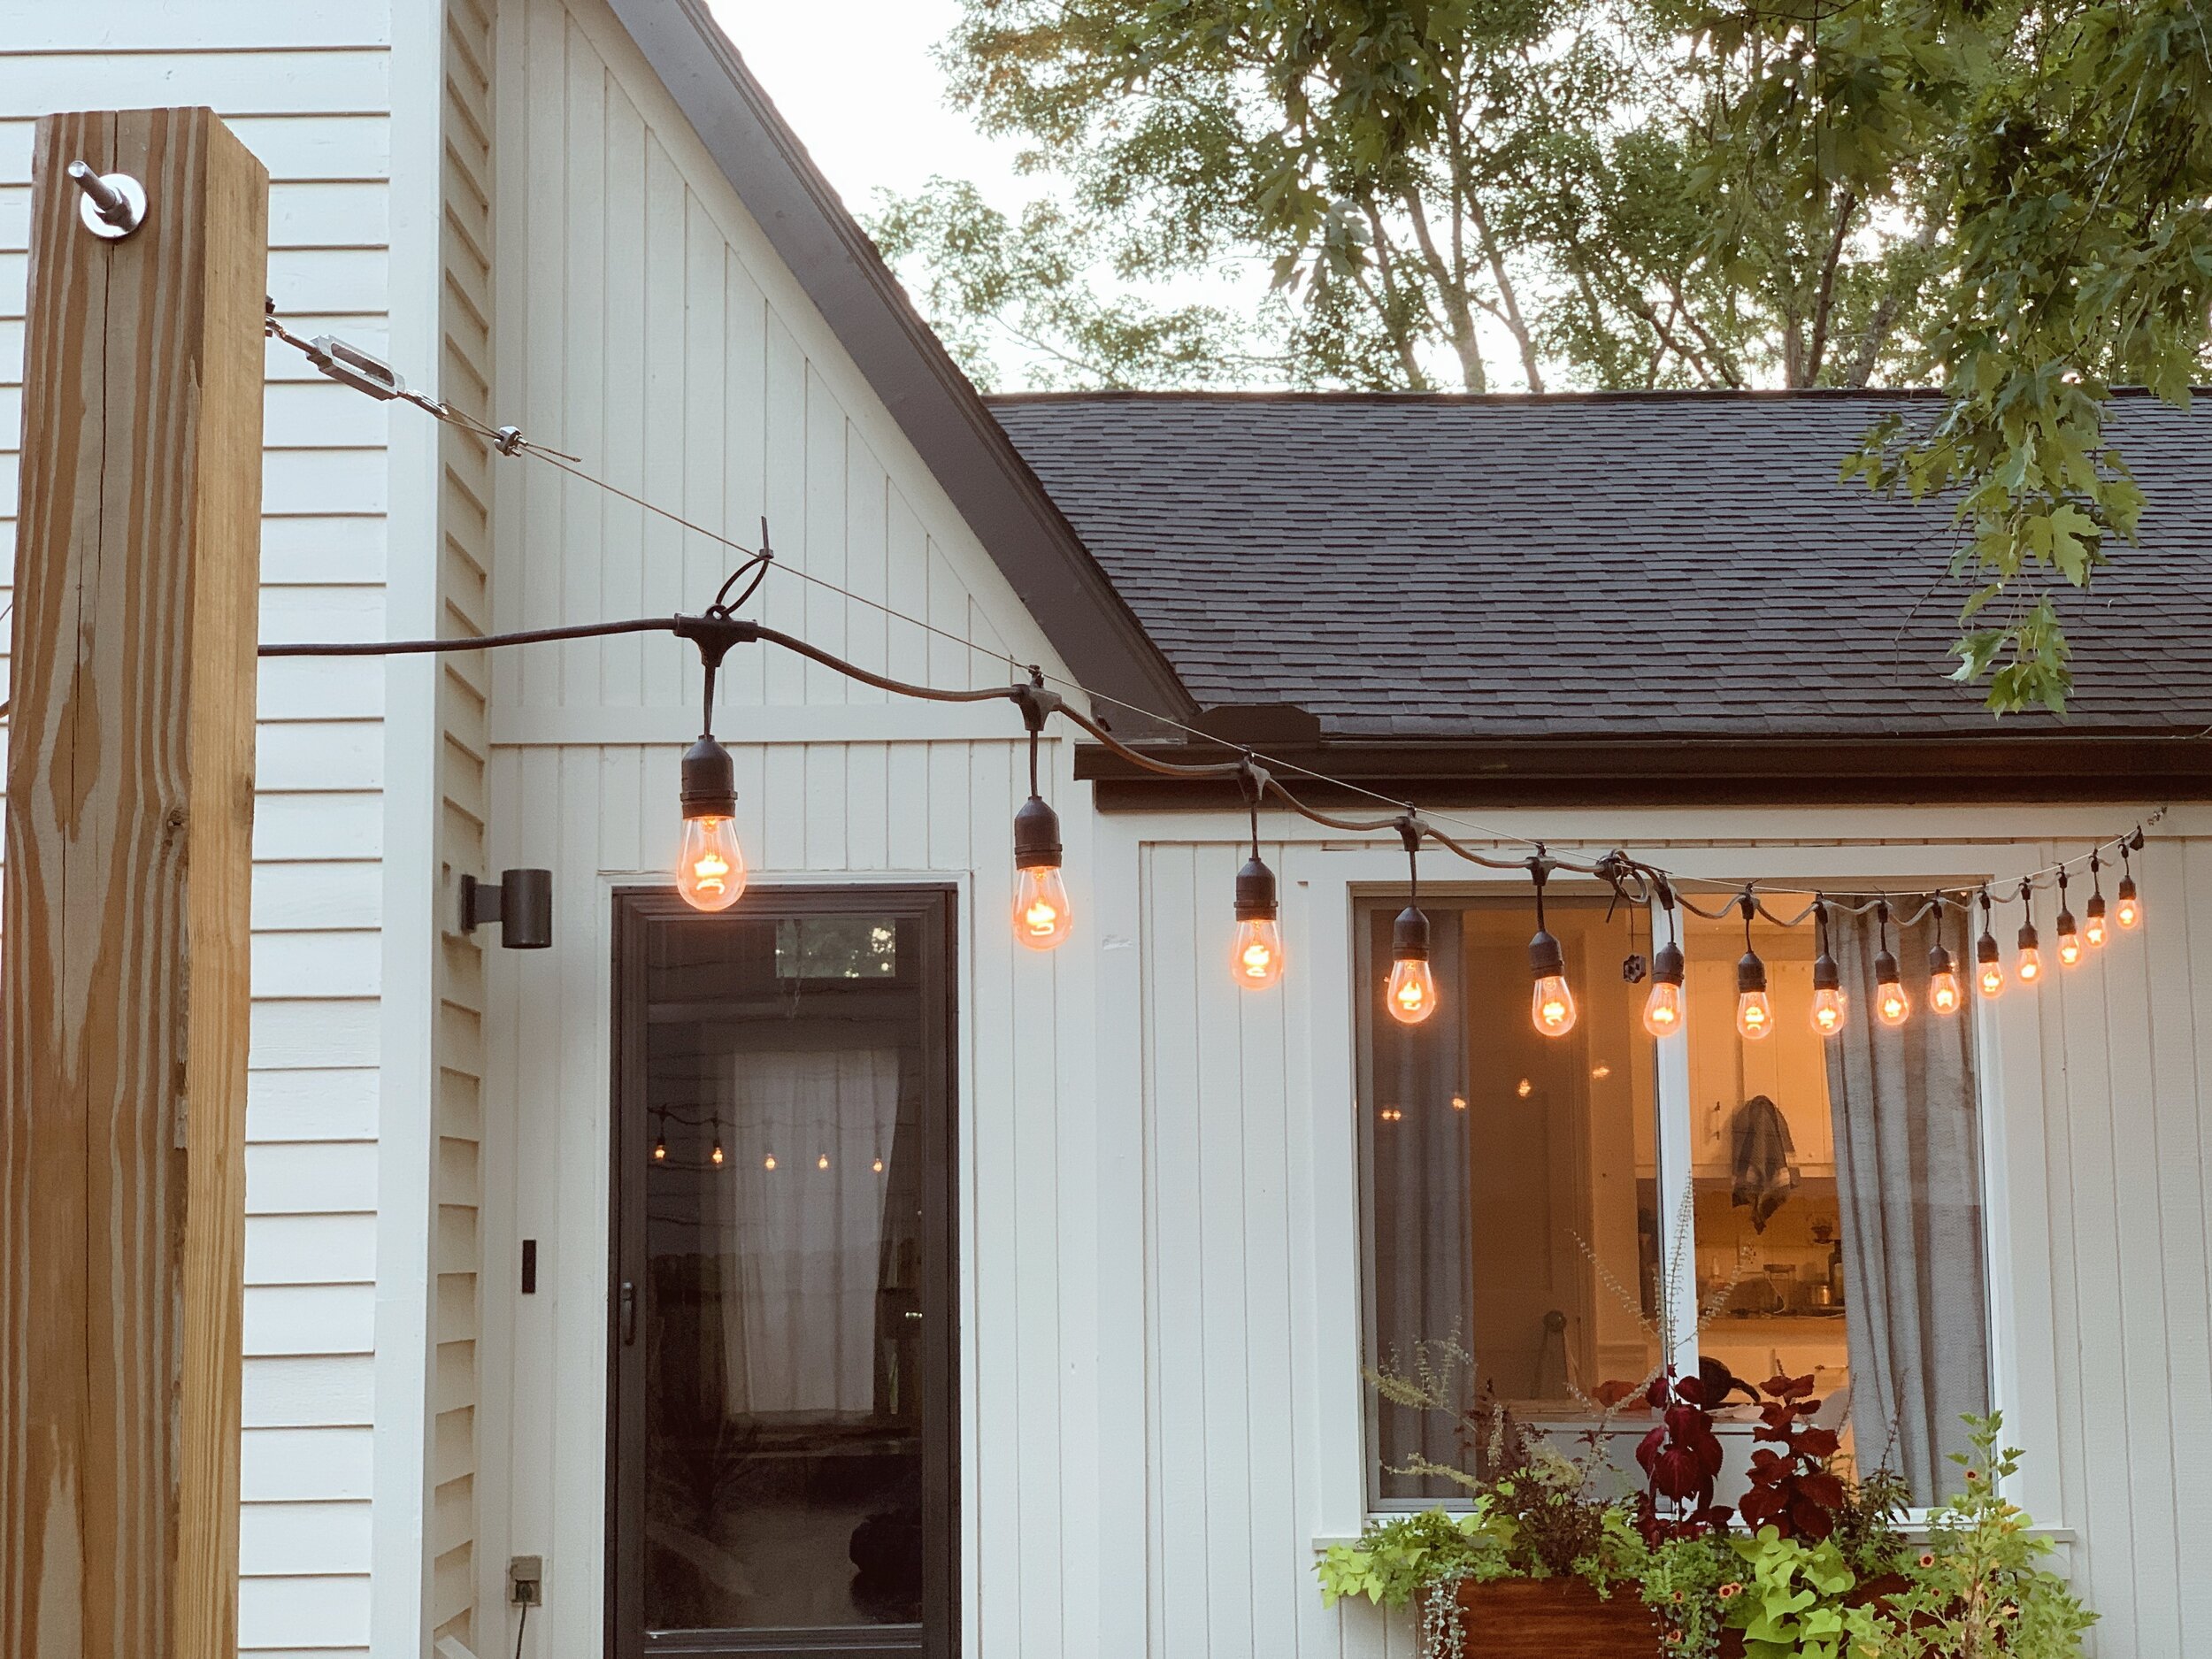
So first of all, if you plan to swag your lights, I would suggest hanging them a little higher than you think you need to — especially if you plan on using cafe lights because the weight of the lights will cause them to droop a bit. This is probably the look you’re going for anyways, but you don’t want them so low that people are having to dodge and duck around them when they’re in your backyard! I wanted mine to hang in a simple V shape from the side of the chimney, over to our new post, and then back to the house by the kitchen window.
We have wood siding, so I tried to take the easy way out and just use screw hooks and wrap the cord around them, but the lights were too low. I moved the screw hook on the chimney up a full foot, but because our new post was only a little over 6 feet above ground and we’re tall people, they were still too low. We ended up following this tutorial (scroll halfway down the page to the string lights section). If you’re looking at this and thinking, “absolutely no way on earth am I doing all of this to hang some stupid lights,” I get it because I said that myself about 25 times. But there really wasn’t a way to hang the lights where we wouldn’t run smack into them, so we had to get a liiiittle technical. It’s much easier than it looks. If I can do it, you can do it, too. Promise!
So basically, the reason you would take these extra steps is so you can make the lights hang more taut. By hooking a turnbuckle onto each screw hook and running stainless steel wire between them, you can create more (or less) tension on the wire, depending on which way you rotate the turnbuckle. And! Each end of the turnbuckle adjusts. So once this wire is installed, you zip tie the lights TO the wire, tighten the turnbuckle to your liking, and you’re all set!
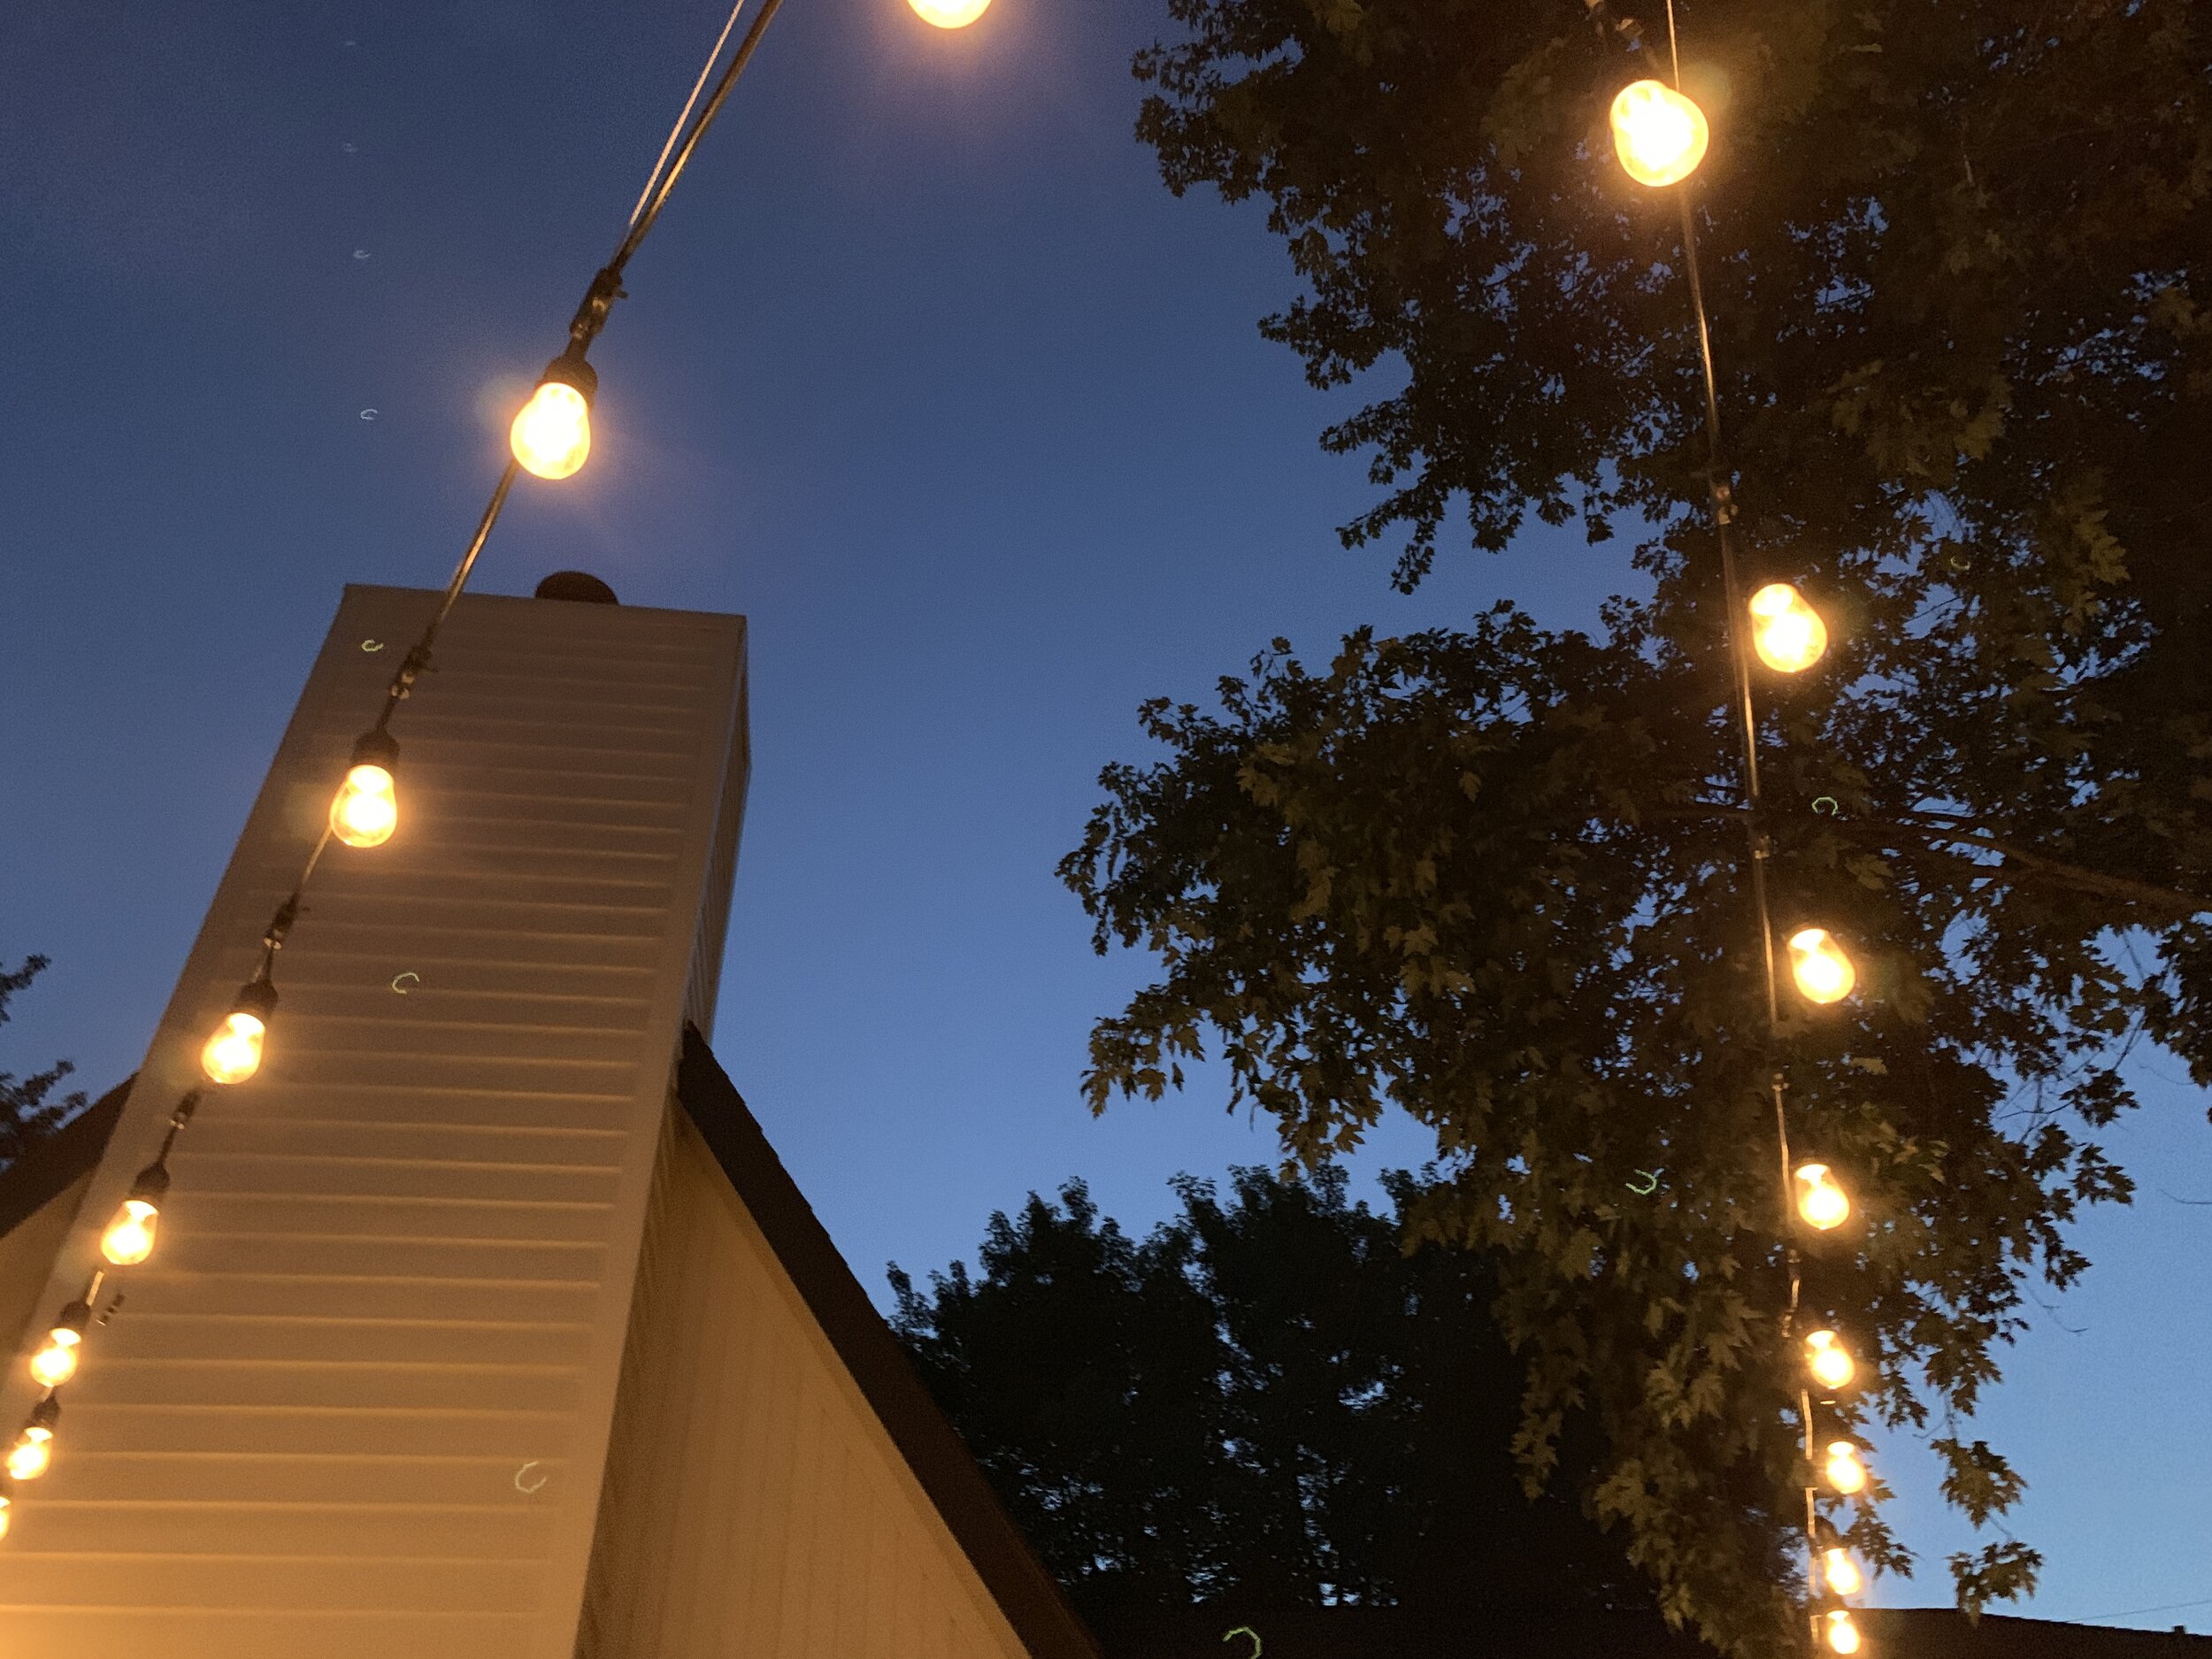
Ambience for daysssss.
We used all of the recommended products in the tutorial except the suggested wire. Home Depot sells stainless steel wire by the foot (which is less likely to rust), and I bought about 10 feet more than I thought I needed because math is hard. Also, having to go to the hardware store in the middle of a project (in the middle of a pandemic??) is pretty much the worst.
Also, a great tip that I saw forever ago on Laura Gummerman’s instagram was to wait to put the bulbs into the sockets until after you’re finished installing all of the lights. That tip saved me about a hundred bucks, so now I’m passing it on to you. You’re welcome!
And that’s it! We lived happily ever after with our beautifully string-lit patio.
WRONG.
WRONG.
SO WRONG.
The lights stayed up for about 3 months with no issues. I was so pleased with them! We hadn’t got to enjoy them much because the weather was so unbearably hot last summer. But fall was coming, and I was impatiently waiting to be able to bask in the glow of my beautiful new lights!
On the day we returned from Europe, they came crashing down. Our neighbors said they heard a popping sound and even went outside to look around, but they didn’t see anything…until they went to our house a few hours later to receive our dogs that had been boarded for 2 weeks and found shards of glass e v e r y w h e r e. And because they’re much nicer than we deserve, they cleaned it all up. Still feel bad about that.
Apparently the post had developed a crack down the middle where I inserted the screw hook, the tension pulled the hook out, and yeah, RIP string lights. If that’s not the rudest awakening after returning from your first vacation in like 6 years, idk what is. Except in addition to that, one of our dogs peed in our bed, and we didn’t realize it until just as we were about to go to sleep that night LOL.
It’s not all sunshine and roses over here, people. Sometimes it’s shards of glass and urine and crying and dog hair. So anyways, my lights sat in a sad little tangled pile in my garage for about 2 months because I couldn’t be bothered. I cussed out that post every time I went into the backyard. I’d all but given up. My neighbor suggested getting a large eye bolt, drilling all the way through the post, and using a washer on each side of the post in case the crack developed further (which was smart bc it HAS). So that’s what I did, and so far, it’s worked!


Here are some shots of the lights on and off and DANG it’s so difficult not to post the full patio reveal, but you’re just gonna have to hang tight!
Also, I feel like it bears stating —
I don’t post all of my blunders on here to scare you out of attempting a project. I do it so you know how to potentially avoid these issues and maybe even save yourself a few dollars in the process!
Some random things I recommend doing if you decide to take on this project:
Caulk around the screw hooks so moisture doesn’t get into the siding.
Use tiny black zip ties (or whatever color matches your strand), attach each light directly to the stainless steel wire, and then tighten and clip the excess with pliers so you don’t see them.
Buy extra lights! I bought 4 sets of 12 ft strands. I only ended up needing 3 because #math but if I’d purchased the longer set of lights, I would have about 12 random feet of lighting leftover. In addition, not all of the lights broke after the first ordeal, and with the extra box of lights, I had exactly enough to put them back up.
Bundle the strands at the connection points with zip ties so there’s the same spacing between ending one set and starting another (No weird 2 ft gaps without lighting)
Go over all of the socket connection points with black electrical tape and do the same with the extension cord just to make them extra secure.
Et voilà!
They’ve been a really great addition to the backyard, and although I had to do it a few times to get it just right, I would definitely do it again (but hope I don’t have to LOL). I feel like this is one of those things that after you do it once, you’ve got it down.
Project breakdown
Cost
Approximately $150. The lights were about $100 of the expense, and we can take them with us when we leave if we want. We spent $17 on stainless steel wire and the rest was on turnbuckles, clamps, the post, concrete, and more zip ties than we will ever get through in this lifetime.
Skill Level
Beginner
Effort Level
It’s pretty easy except digging the hole for the post, BUT you don’t need to do this step unless you have nowhere else to attach the lights. And even if you don’t, you can always put a post in a planter like this or put it in a bucket like this or attach the lights to an existing structure. It varies based on your setup.
